

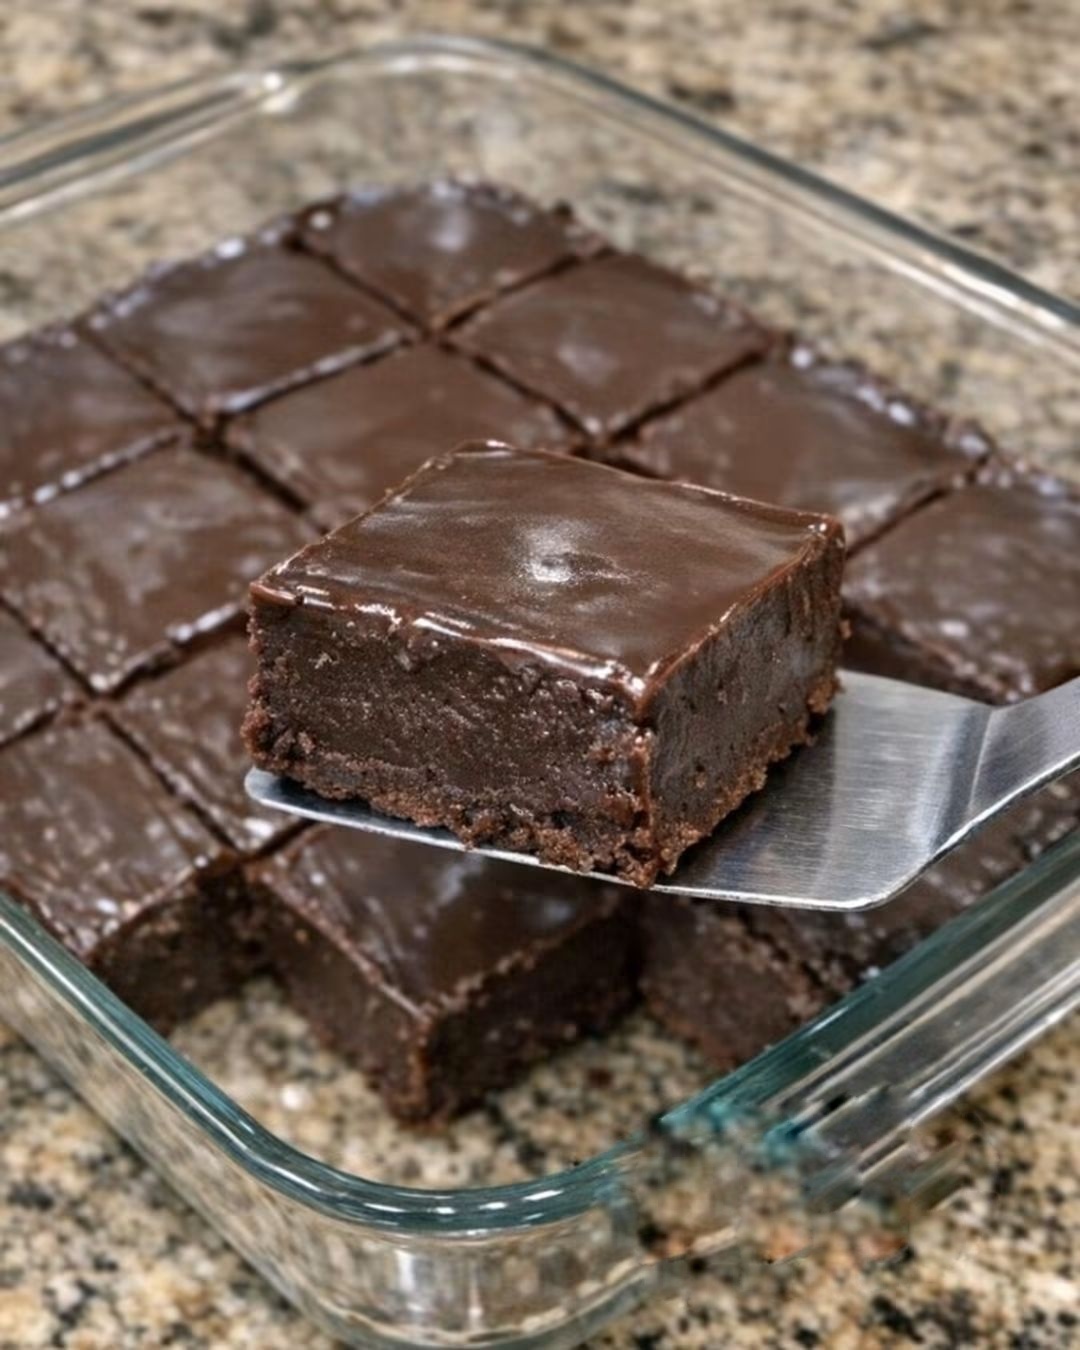
2-Ingredient Chocolate Fudge: An Easy, Old-Fashioned Chocolate Treat
Introduction
Some recipes earn a permanent place in the family recipe notebook because they are wonderfully simple, incredibly delicious, and easy enough to prepare whenever a chocolate craving strikes. This 2-Ingredient Chocolate Fudge is one of those timeless homemade treats. Made with just semi-sweet chocolate chips and sweetened condensed milk, it delivers a rich chocolate flavor and a smooth, creamy texture without requiring complicated techniques or a long list of ingredients.
Whether you are preparing a quick dessert for your family, putting together a holiday cookie tray, or looking for a thoughtful homemade gift, this easy chocolate fudge is a recipe worth keeping close. The preparation is straightforward, the ingredients are easy to find, and the results look beautiful when cut into neat little squares. Best of all, you do not need a candy thermometer or advanced candy-making skills to make this simplified version.
The secret to this recipe is the combination of melted chocolate and sweetened condensed milk. The chocolate provides its deep, satisfying cocoa flavor, while the condensed milk contributes sweetness and a creamy consistency. Once combined and chilled, the mixture becomes firm enough to slice into small squares that practically melt in your mouth.
This fudge is especially useful during busy seasons when you want homemade sweets without spending hours in the kitchen. It is perfect for Christmas dessert platters, birthday celebrations, bake sales, potlucks, Valentine’s Day treats, and cozy evenings at home. Because the recipe makes approximately 25 small squares, it is also easy to share with friends, neighbors, coworkers, and family members.
Serve each square with a cold glass of milk, a cup of freshly brewed coffee, or a warm mug of tea. For a more elegant dessert, arrange the fudge on a platter with fresh strawberries, raspberries, or a scoop of vanilla ice cream. However you choose to serve it, this simple two-ingredient recipe proves that delicious homemade candy does not have to be complicated.
Why You Will Love This 2-Ingredient Chocolate Fudge
- Only two ingredients: You need chocolate chips and sweetened condensed milk to make the basic recipe.
- Quick preparation: The mixture comes together in just a few minutes.
- No candy thermometer required: This simplified method is approachable for beginner cooks.
- Rich chocolate flavor: Semi-sweet chocolate creates a satisfying balance of sweetness and cocoa flavor.
- Perfect for sharing: Cut the fudge into small squares for parties, gifts, and dessert trays.
- Easy to customize: Add nuts, marshmallows, or other favorite ingredients for different flavors and textures.
- Make-ahead friendly: The fudge needs time to chill, making it convenient to prepare before an event.
Recipe Overview
- Recipe Name: 2-Ingredient Chocolate Fudge
- Preparation Time: 10 minutes
- Cooking Time: 5–10 minutes
- Chilling Time: 2–3 hours
- Total Time: Approximately 2 hours 20 minutes to 3 hours 20 minutes
- Servings: 25 small squares
- Difficulty: Easy
- Cooking Method: Stovetop melting and refrigeration
- Category: Dessert, Candy, Chocolate Treat
- Flavor: Rich, creamy, sweet chocolate
Ingredients for 2-Ingredient Chocolate Fudge
The beauty of this recipe lies in its simplicity. You only need two basic ingredients to create a smooth chocolate mixture that sets into delicious fudge after chilling.
1. Semi-Sweet Chocolate Chips – 3 Cups
Semi-sweet chocolate chips provide the main flavor and structure of the fudge. Their balanced sweetness works particularly well with sweetened condensed milk, producing a rich chocolate treat that is sweet without being overwhelmingly sugary.
Choose good-quality chocolate chips for the best flavor. You can also use chopped semi-sweet chocolate bars, provided they melt smoothly. Chocolate chips from different brands may behave slightly differently when melted, so stir gently and avoid excessive heat.
2. Sweetened Condensed Milk – 1 Can (14 Ounces)
Sweetened condensed milk gives the fudge its creamy texture and sweetness. It is concentrated milk with sugar already added, making it particularly useful for simplified fudge recipes.
Make sure you use sweetened condensed milk rather than evaporated milk. These products are not interchangeable in this recipe because evaporated milk does not contain the same amount of added sugar and will not produce the same consistency.
Equipment You Will Need
- One small square baking dish or loaf pan
- Parchment paper
- A medium saucepan
- A heat-resistant spatula or wooden spoon
- Measuring cups
- A sharp knife
- A cutting board
- An airtight container for storage
A square pan creates traditional fudge squares, while a loaf pan produces thicker pieces. The exact thickness will depend on the size of your pan.
Instructions: How to Make 2-Ingredient Chocolate Fudge
Step 1: Prepare the Baking Pan
Begin by selecting a small square baking dish or loaf pan. Line the pan with parchment paper, allowing some paper to hang over two opposite sides.
The extra parchment creates convenient handles that make it easy to lift the chilled fudge out of the pan without damaging the edges.
Press the parchment into the corners and smooth out any large folds. If necessary, lightly crease the paper to help it stay in place.
Preparing the pan before melting the chocolate is important because the mixture will begin to thicken as it cools. Having everything ready allows you to transfer the mixture quickly and evenly.
Step 2: Combine the Chocolate Chips and Condensed Milk
Place the three cups of semi-sweet chocolate chips into a medium saucepan. Pour in the entire 14-ounce can of sweetened condensed milk.
Set the saucepan over low heat. Begin stirring slowly with a heat-resistant spatula, making sure to scrape the bottom and sides of the pan regularly.
As the chocolate warms, it will gradually soften and begin to melt into the condensed milk. Continue stirring until the ingredients combine into a thick, smooth, glossy mixture.
This process generally takes approximately five to ten minutes, depending on the saucepan, heat level, and type of chocolate used.
Important tip: Keep the heat low. Chocolate can scorch or become grainy when exposed to excessive heat. If the mixture begins melting too quickly, remove the saucepan from the heat briefly while continuing to stir.
Step 3: Check the Texture
Once the chocolate has melted completely, inspect the mixture carefully. It should look thick, glossy, and evenly combined, with no visible pieces of unmelted chocolate.
If a few small chocolate pieces remain, remove the pan from the heat and continue stirring gently. The remaining warmth may be enough to melt them without additional cooking.
Avoid adding water or other liquids to the mixture. Even a small amount of unwanted moisture can affect the chocolate’s texture.
Step 4: Transfer the Mixture to the Prepared Pan
Remove the saucepan from the heat. Carefully pour the warm chocolate mixture into the parchment-lined pan.
Use a spatula to scrape the saucepan and transfer as much of the mixture as possible. Spread the chocolate evenly into the corners and smooth the surface.
If you prefer a decorative finish, gently create a smooth, even top with the back of the spatula. You can also add a few optional toppings, such as chopped nuts, before the mixture begins to set.
Step 5: Refrigerate Until Firm
Place the pan in the refrigerator and chill the fudge for approximately two to three hours, or until the mixture is firm enough to cut cleanly.
The exact chilling time depends on the size of the pan, the thickness of the fudge, and the temperature of your refrigerator.
For the neatest squares, allow the fudge to become completely firm before attempting to remove it from the pan. Cutting it too early may cause the pieces to lose their shape.
Step 6: Lift Out the Fudge
Once the fudge has set, grasp the parchment paper overhang and gently lift the entire chocolate slab out of the pan.
Transfer it to a clean cutting board. Peel the parchment away from the sides and bottom as needed.
If the fudge feels very firm, allow it to rest at room temperature for approximately five to ten minutes before cutting.
Step 7: Cut into Small Squares
Use a large, sharp knife to cut the fudge into approximately 25 small squares. For more uniform pieces, cut the slab into five rows in each direction.
For cleaner edges, wipe the knife with a clean cloth between cuts. If the fudge sticks to the blade, warm the knife slightly and dry it completely before continuing.
Cut smaller squares if you are serving the fudge on a dessert tray or preparing homemade gifts. Larger pieces are ideal when you want a more substantial chocolate treat.
Step 8: Serve and Enjoy
Arrange the finished squares on a serving plate or place them in small paper candy cups for a polished presentation.
Serve them with coffee, tea, or cold milk. You can also add fresh berries or vanilla ice cream to create a simple dessert plate.
For gifting, arrange the completely chilled pieces in a clean food-safe box or tin, separating layers with parchment paper. Keep the fudge refrigerated when necessary and follow appropriate food-storage practices.
Preparation Methods: Alternative Ways to Melt the Chocolate
The stovetop method is simple and reliable, but there are other ways to melt the chocolate and condensed milk. Whichever method you choose, the goal is to warm the ingredients gently until the mixture is smooth.
Method 1: Stovetop Method
This is the method used in the main recipe.
- Add the chocolate chips and sweetened condensed milk to a saucepan.
- Place the saucepan over low heat.
- Stir continuously until the chocolate melts and the mixture becomes smooth.
- Remove from the heat as soon as the mixture is fully combined.
- Transfer the mixture to the prepared pan and refrigerate until firm.
This method gives you direct control over the melting process. However, it is important to keep the heat low and stir frequently to prevent scorching.
Method 2: Double-Boiler Method
A double boiler provides gentle, indirect heat and is useful if you are concerned about overheating the chocolate.
- Place a heatproof bowl over a saucepan containing a small amount of gently simmering water.
- Make sure the bottom of the bowl does not touch the water.
- Add the chocolate chips and sweetened condensed milk to the bowl.
- Stir gently until the chocolate melts and the mixture becomes smooth.
- Remove the bowl from the heat and carefully transfer the mixture to the prepared pan.
- Refrigerate until firm.
Prevent steam and water droplets from entering the chocolate mixture. Keep the bowl and utensils dry to help maintain a smooth texture.
Method 3: Microwave Method
If you prefer a quicker approach, you can melt the ingredients in a microwave-safe bowl.
- Place the chocolate chips and sweetened condensed milk in a large microwave-safe bowl.
- Heat at medium power for 20–30 seconds at a time.
- Stir thoroughly after each interval.
- Repeat until the chocolate is nearly melted and the mixture is smooth.
- Use the residual heat and gentle stirring to melt any remaining chocolate pieces.
- Transfer the mixture to the prepared pan and refrigerate for two to three hours.
Microwave power varies, so avoid heating the mixture for long periods without stirring. Gentle heating is the best way to prevent scorching and maintain a creamy texture.
The History of Chocolate Fudge
Chocolate fudge has a long association with American home baking, candy shops, college communities, and family celebrations. Although the precise origin of the first fudge recipe is uncertain, written recipes and references to fudge became increasingly popular in the United States during the late nineteenth century.
Traditional fudge is generally made by cooking sugar, milk or cream, and chocolate or other flavorings to a specific temperature. The mixture is then cooled and worked in a way that encourages the formation of tiny sugar crystals, producing the characteristic smooth yet slightly firm texture.
Early fudge recipes required attention to temperature and timing. Home cooks often used a candy thermometer or relied on experience to determine when the mixture had reached the correct stage.
Over time, simpler fudge recipes became popular. Sweetened condensed milk offered a convenient alternative for home cooks because it already contains concentrated milk and sugar. When combined with chocolate, it can produce a rich, firm confection without requiring the same temperature-control techniques used in traditional fudge-making.
The two-ingredient version represents this convenient approach to homemade candy. Instead of cooking a mixture of sugar, milk, and chocolate through a precise candy-making stage, the cook gently melts chocolate chips with sweetened condensed milk and allows the mixture to set in the refrigerator.
Today, simplified fudge recipes are especially popular around holidays, when people prepare homemade treats for family gatherings, bake sales, gift boxes, and dessert tables. The method is flexible enough to accommodate nuts, marshmallows, flavored extracts, and other additions.
Although this modern recipe is not identical to traditional cooked fudge, it captures much of the same appeal: rich chocolate flavor, small shareable squares, and the pleasure of making a sweet treat at home.
Benefits of Making 2-Ingredient Chocolate Fudge
1. Simple Ingredients
One of the most appealing features of this recipe is its short ingredient list. Chocolate chips and sweetened condensed milk are widely available in many grocery stores, making this dessert easy to prepare without purchasing numerous specialty ingredients.
The simplicity also makes it easier to organize your shopping list and prepare the recipe when you need a quick homemade sweet.
2. Beginner-Friendly Preparation
This fudge is suitable for many beginner cooks because it does not require advanced baking techniques. There is no dough to knead, no cake batter to prepare, and no complicated decorating process.
The main task is to melt the ingredients gently, transfer the mixture to a pan, and allow it to chill.
3. Convenient Make-Ahead Dessert
Since the fudge needs time to set in the refrigerator, it is a convenient dessert to prepare before a gathering.
Make it several hours before serving, or prepare it ahead of time and store it properly. This allows you to focus on other dishes when guests arrive.
4. Easy Portion Control
Cutting the fudge into small squares makes it easy to serve a modest portion. Small pieces are particularly useful for dessert buffets, holiday platters, and gift boxes where guests may want to sample several different treats.
Because this recipe is rich and sweet, a small square can be a satisfying way to enjoy chocolate.
5. Customizable Flavor
The basic recipe provides a useful starting point for many flavor combinations. You can add chopped nuts, mini marshmallows, or a small amount of vanilla extract to create variations suited to your taste.
Different types of chocolate can also change the flavor and sweetness of the finished fudge.
6. A Thoughtful Homemade Gift
Homemade fudge is easy to package attractively. Place the chilled squares in a food-safe tin or gift box lined with parchment paper, and add a simple label with the preparation date and storage instructions.
This makes the recipe a practical option for holiday gifts, thank-you treats, and small homemade presents for friends and neighbors.
7. A Sweet Addition to Celebrations
Chocolate fudge works well on dessert tables for birthdays, family gatherings, holiday parties, and other celebrations. Its small size makes it easy to serve alongside cookies, brownies, fruit, and other sweets.
Nutrition note: Chocolate fudge is a dessert and can contain substantial amounts of sugar, calories, and saturated fat. The nutritional content depends on the chocolate brand, condensed milk, portion size, and optional additions. Enjoy it in moderation as part of a varied diet.
Delicious Variations and Easy Add-Ins
Although the original recipe needs only two ingredients, you can customize the fudge with a few optional additions. For the best results, prepare the basic mixture first and stir in dry additions just before transferring it to the pan.
1. Milk Chocolate Fudge
Replace the semi-sweet chocolate chips with milk chocolate chips for a sweeter, milder chocolate flavor.
Milk chocolate may produce a softer or sweeter result depending on its composition, so allow the fudge to chill completely before slicing.
This version is especially suitable for people who prefer a less intense cocoa flavor.
2. Dark Chocolate Fudge
Use dark chocolate chips for a deeper, more pronounced chocolate flavor. This option is ideal for people who enjoy desserts that are less sweet and have a stronger cocoa taste.
Because different dark chocolates contain different amounts of cocoa solids and cocoa butter, the final texture may vary.
3. Chocolate Walnut Fudge
Stir approximately 1/2 cup of chopped walnuts into the melted chocolate mixture before pouring it into the pan.
The walnuts add a pleasant crunch that contrasts with the smooth chocolate. Pecans or almonds are also excellent choices.
4. Marshmallow Chocolate Fudge
Add a small handful of mini marshmallows to the chocolate mixture after removing it from the heat. Stir briefly to distribute them without allowing them to melt completely.
This creates soft, sweet pockets throughout the fudge. You can also sprinkle a few marshmallows over the top for a decorative finish.
5. Chocolate Peanut Butter Fudge
For a chocolate and peanut butter variation, swirl a few tablespoons of creamy peanut butter into the chocolate mixture just before chilling.
Use a knife or skewer to create decorative swirls. Keep in mind that adding peanut butter changes the recipe from two ingredients to three and may affect the firmness of the finished fudge.
6. Chocolate Coconut Fudge
Add a small amount of unsweetened shredded coconut to the melted mixture for a gentle coconut flavor and extra texture.
You can also sprinkle coconut over the top before refrigerating. Toasted coconut provides a deeper flavor, but allow it to cool before adding it to the mixture.
7. Chocolate Orange Fudge
Add a little finely grated orange zest to the melted chocolate mixture for a fresh citrus aroma.
Use only the colored outer peel of the orange and avoid grating the bitter white pith. A small amount of orange extract is another option if you prefer a stronger flavor.
8. Sea Salt Chocolate Fudge
Sprinkle a small pinch of flaky sea salt over the surface of the fudge before chilling.
The salt provides a pleasant contrast to the sweetness and enhances the chocolate flavor. Use a light hand because too much salt can overpower the dessert.
9. Holiday Chocolate Fudge
For a festive version, add a small amount of colorful sprinkles or finely chopped nuts to the top before the mixture sets.
You can also use holiday-themed decorations to match birthdays, Christmas celebrations, or other special occasions.
Serving Suggestions
Serve with Cold Milk
A glass of cold milk is a classic companion for rich chocolate fudge. The cool, creamy drink balances the intense sweetness and makes the treat especially enjoyable as an afternoon snack or after-dinner dessert.
Pair with Coffee
Serve a small square of fudge alongside hot coffee. The roasted flavor of coffee complements the chocolate and creates a simple dessert experience without requiring additional preparation.
Enjoy with Tea
Black tea, mint tea, and other unsweetened teas provide a pleasant contrast to the richness of the fudge.
Add Fresh Berries
Arrange the fudge on a platter with fresh strawberries or raspberries. Their bright flavor and slight tartness provide a refreshing contrast to the creamy chocolate.
Serve with Vanilla Ice Cream
For a more indulgent dessert, serve a small square of fudge alongside vanilla ice cream. The cold ice cream contrasts with the dense chocolate texture and creates an easy dessert for family dinners or guests.
Create a Dessert Gift Box
Combine small fudge squares with homemade cookies, chocolate-covered pretzels, or other sweets in a food-safe gift box.
Use parchment paper to separate the layers and keep the box in an appropriately cool place. If the fudge is intended for gifting, include storage guidance so the recipient knows how to keep it fresh.
Storage Instructions
How to Store Chocolate Fudge in the Refrigerator
Place the fudge in an airtight container and refrigerate it. Separate layers with parchment paper to help prevent the pieces from sticking together.
For the best texture and quality, aim to consume the fudge within about one to two weeks. Actual storage life depends on ingredient handling, refrigerator temperature, and the manufacturer’s guidance for the ingredients used.
Keep the container sealed to prevent the fudge from absorbing odors from other foods in the refrigerator.
Can Chocolate Fudge Be Stored at Room Temperature?
For this recipe, refrigeration is the most reliable storage option, especially in warm weather. If you choose to serve the fudge at room temperature, remove only the amount you plan to eat and avoid leaving it out for extended periods.
The fudge may soften in a warm room, making it more difficult to handle and package neatly.
Can You Freeze Chocolate Fudge?
Yes. Chocolate fudge can generally be frozen for longer storage.
- Cut the completely chilled fudge into squares.
- Arrange the squares in an airtight, freezer-safe container.
- Separate the layers with parchment paper.
- Seal the container to reduce exposure to air and moisture.
- Label the container with the date and freeze.
For the best quality, use the frozen fudge within approximately two to three months.
When you want to serve it, thaw the fudge in its covered container in the refrigerator. Keeping it covered during thawing helps limit condensation on the chocolate surface.
Common Mistakes to Avoid
- Using evaporated milk: Evaporated milk is not a suitable replacement for sweetened condensed milk in this recipe.
- Heating the chocolate too quickly: Excessive heat can scorch the chocolate or cause the mixture to become grainy.
- Stopping before the chocolate melts completely: Unmelted pieces can create an uneven texture. Continue gentle stirring until the mixture is smooth.
- Adding water to the chocolate: Unwanted moisture can interfere with the chocolate’s texture.
- Using an unlined pan: Without parchment paper, removing the chilled fudge may be difficult.
- Cutting the fudge too early: The mixture needs enough time to become firm before slicing.
- Using a dull knife: A sharp knife produces cleaner squares and reduces crumbling.
- Storing the fudge uncovered: Exposure to air can affect the surface and allow the fudge to absorb other refrigerator odors.
- Adding too many extras: Large amounts of nuts, marshmallows, or other ingredients can affect how well the fudge holds together.
Frequently Asked Questions
Can I Make This Fudge with Only Two Ingredients?
Yes. The basic recipe uses three cups of semi-sweet chocolate chips and one 14-ounce can of sweetened condensed milk. Optional additions such as nuts, marshmallows, or flavorings are not necessary.
Why Is My Chocolate Fudge Too Soft?
The fudge may need more chilling time, or the chocolate used may have a composition that produces a softer result. Refrigerate it until fully firm before cutting. Also, measure the ingredients carefully and make sure you used sweetened condensed milk rather than evaporated milk.
Why Is My Fudge Grainy?
Graininess may occur if the chocolate becomes overheated or the mixture is not properly combined. Use low heat, stir gently, and remove the pan from the heat as soon as the chocolate has melted.
Can I Use a Microwave Instead of a Stovetop?
Yes. Combine the chocolate chips and condensed milk in a microwave-safe bowl and heat in short intervals, stirring after each one. Stop heating when the mixture is smooth.
How Long Does the Fudge Need to Chill?
Most batches need approximately two to three hours in the refrigerator. Thicker fudge may take longer, so check that it is firm before slicing.
Can I Double the Recipe?
Yes. You can double the ingredients if you need a larger batch. Use a larger pan or two smaller pans, and remember that the thickness of the fudge affects the chilling time.
Can I Use Chocolate Bars Instead of Chocolate Chips?
Yes. Finely chopped chocolate bars can be used, provided they melt smoothly. The final texture may differ slightly depending on the chocolate’s cocoa content and composition.
Can I Make This Fudge for Christmas Gifts?
Absolutely. Cut the chilled fudge into neat squares and arrange them in food-safe gift boxes or tins. Separate the layers with parchment paper and include storage instructions.
How Many Pieces Does This Recipe Make?
The recipe makes approximately 25 small squares when prepared in a suitable pan and cut into five rows in each direction. The final yield depends on the pan size and how large you cut the pieces.
Tips for Chocolate Lovers
If you love chocolate desserts, this two-ingredient fudge is a wonderful recipe to keep in your collection. It offers a rich chocolate flavor without the extra work involved in preparing a traditional cooked candy mixture.
For a deeper chocolate taste, choose semi-sweet chocolate with a flavor you enjoy eating on its own. If you prefer a sweeter dessert, try milk chocolate. For a more intense cocoa flavor, experiment with dark chocolate, keeping in mind that different chocolates can produce different textures.
Small squares are ideal for sharing because fudge is rich and satisfying. Present the pieces in decorative paper candy cups or arrange them neatly on a plate for an attractive homemade dessert.
You can also experiment with a different variation each time you prepare the recipe. Try walnuts for crunch, coconut for extra texture, orange zest for a fresh aroma, or a little sea salt for a sweet-and-salty contrast.
Most importantly, take your time when melting the chocolate. Gentle heat and steady stirring make the process easier and help create the smooth mixture that gives this fudge its appealing texture.
Conclusion
This 2-Ingredient Chocolate Fudge is proof that a delicious homemade dessert does not need a complicated ingredient list or hours of preparation. With semi-sweet chocolate chips and sweetened condensed milk, you can create a rich, creamy chocolate treat that is easy to prepare and lovely to share.
The straightforward method makes it suitable for beginner cooks, while the flexibility of the recipe allows experienced home cooks to experiment with different chocolates, nuts, marshmallows, and other flavor combinations.
Whether you are preparing a quick dessert for your family, assembling a holiday treat tray, or creating a thoughtful homemade gift, these chocolate squares offer a simple and satisfying option. Serve them with coffee, tea, cold milk, or fresh berries for an easy finishing touch.
Prepare a batch, allow it to chill until firm, and cut it into neat little squares. Keep the leftovers stored properly, and enjoy a small piece whenever you want a rich chocolate treat.
Once you discover how easy this recipe is, it may become one of your favorite ways to make homemade chocolate fudge without unnecessary fuss.
Printable Recipe Card
2-Ingredient Chocolate Fudge
A rich, creamy chocolate fudge made with only two ingredients. Perfect for holiday trays, homemade gifts, parties, and everyday chocolate cravings.
Prep Time: 10 minutes
Cooking Time: 5–10 minutes
Chilling Time: 2–3 hours
Total Time: Approximately 2 hours 20 minutes to 3 hours 20 minutes
Yield: 25 small squares
Ingredients
- 3 cups semi-sweet chocolate chips
- 1 can (14 ounces) sweetened condensed milk
Instructions
- Line a small square baking dish or loaf pan with parchment paper.
- Combine the chocolate chips and sweetened condensed milk in a saucepan.
- Heat over low heat, stirring continuously until the mixture is smooth and glossy.
- Pour the mixture into the prepared pan and spread it evenly.
- Refrigerate for two to three hours, or until firm.
- Lift the fudge from the pan using the parchment paper.
- Allow it to rest for five to ten minutes if necessary, then cut into small squares.
- Serve and enjoy, or refrigerate in an airtight container.
Helpful Tips
- Use low heat to prevent the chocolate from scorching.
- Use sweetened condensed milk, not evaporated milk.
- Chill completely before slicing.
- Wipe the knife clean between cuts for neater squares.
- Store the fudge in an airtight container in the refrigerator.
Optional Variations
- Chopped walnuts or pecans
- Mini marshmallows
- Milk chocolate or dark chocolate
- Shredded coconut
- A small pinch of flaky sea salt